Install an OpenShift lab on a single Hetzner server with the Assisted Installer
Warning: This document / project / repository / playbooks should be used only for testing OpenShift Container Platform 4.x and NOT for production environments.
A few years ago I wrote about installing an OpenShift lab with the baremetal IPI method, first on a homelab using nested virtualization and then on Hetzner Root Servers, both based on the ocp4-in-the-jars project. IPI on baremetal is powerful, but it has a lot of moving parts – a provisioning network, sushy/vbmc to emulate Redfish/IPMI, two bridges, MAC bookkeeping in a big JSON file – and for a less technical audience it can feel like too much just to get a cluster to play with.
This time I wanted something simpler. The Assisted Installer on console.redhat.com does most of the heavy lifting for you: you fill in a short wizard, download a discovery ISO, boot your nodes from it, and the service drives the installation. I wrapped the rest – the hypervisor VMs, DNS/DHCP, external Ceph storage, ODF and the identity provider – into a new Ansible project, ocp-assisted-in-the-jars, so the whole lab comes up with essentially make deploy.
In this post I’ll deploy a 3-node compact OpenShift cluster on a single Hetzner dedicated server with at least 128 GB of RAM, using nested virtualization. The same automation also supports spreading the VMs across multiple hypervisors, but here I’ll keep it to the single-host case, which is the easiest one to start with.
What we are going to build
The hypervisor is a single Hetzner server running CentOS Stream. On top of it, the automation creates a handful of KVM/libvirt VMs:
[Hetzner dedicated server - CentOS Stream, KVM, nested virt]
   |
   +-- libvirt NAT network: 192.168.203.0/24
         |
         +-- utility         (.254) -- dnsmasq (DNS + DHCP), RHEL 10
         +-- ceph            (.252) -- single-node Ceph via cephadm, 3 OSDs, RHEL 10
         +-- control-plane-0 (.53)  -- empty VM, boots from the discovery ISO
         +-- control-plane-1 (.54)  -- empty VM, boots from the discovery ISO
         +-- control-plane-2 (.55)  -- empty VM, boots from the discovery ISO
         |
         +-- API VIP         (.80)  -- managed by OpenShift
         +-- Ingress VIP     (.81)  -- managed by OpenShift
| VM | vCPU | RAM | OS disk | Extra disks |
|---|---|---|---|---|
| utility | 2 | 4 GB | 50 GB | - |
| ceph | 4 | 16 GB | 50 GB | 3 × 200 GB OSD |
| control-plane-0/1/2 | 16 | 32 GB | 120 GB | DVD/cdrom (discovery ISO) |
That adds up to roughly 116 GB of RAM for the VMs, which is why a server with 128 GB (plus some swap) is the sweet spot. The three control-plane VMs use CPU host-passthrough so the cluster can later run OpenShift Virtualization too.
The utility VM provides DNS and DHCP for the cluster network (the libvirt NAT network does not), the ceph VM provides external storage, and at the end the automation wires up OpenShift Data Foundation (ODF) in external mode against that Ceph cluster and configures an HTPasswd identity provider.
Prerequisites
- A Hetzner dedicated server (a server auction machine is perfect for a lab) with ≥ 128 GB RAM and ≥ 500 GB of free disk for
/var/lib/libvirt/images. - A Red Hat account on console.redhat.com (a free Developer subscription is enough for a lab).
- The RHEL 10 KVM guest image (
rhel-10.2-x86_64-kvm.qcow2) from access.redhat.com – used as the golden image for theutilityandcephVMs. - A pull secret and a Red Hat activation key (we’ll create both below).
- Your SSH public key uploaded to the Hetzner Robot (Server → Key management → New key).
Install CentOS Stream on the Hetzner server
The hypervisor in this guide runs CentOS Stream, installed with Hetzner’s installimage. (The reference automation also runs on Gentoo; on RHEL/CentOS the make prepare-hypervisor target can configure the host for you, which is what we’ll use.)
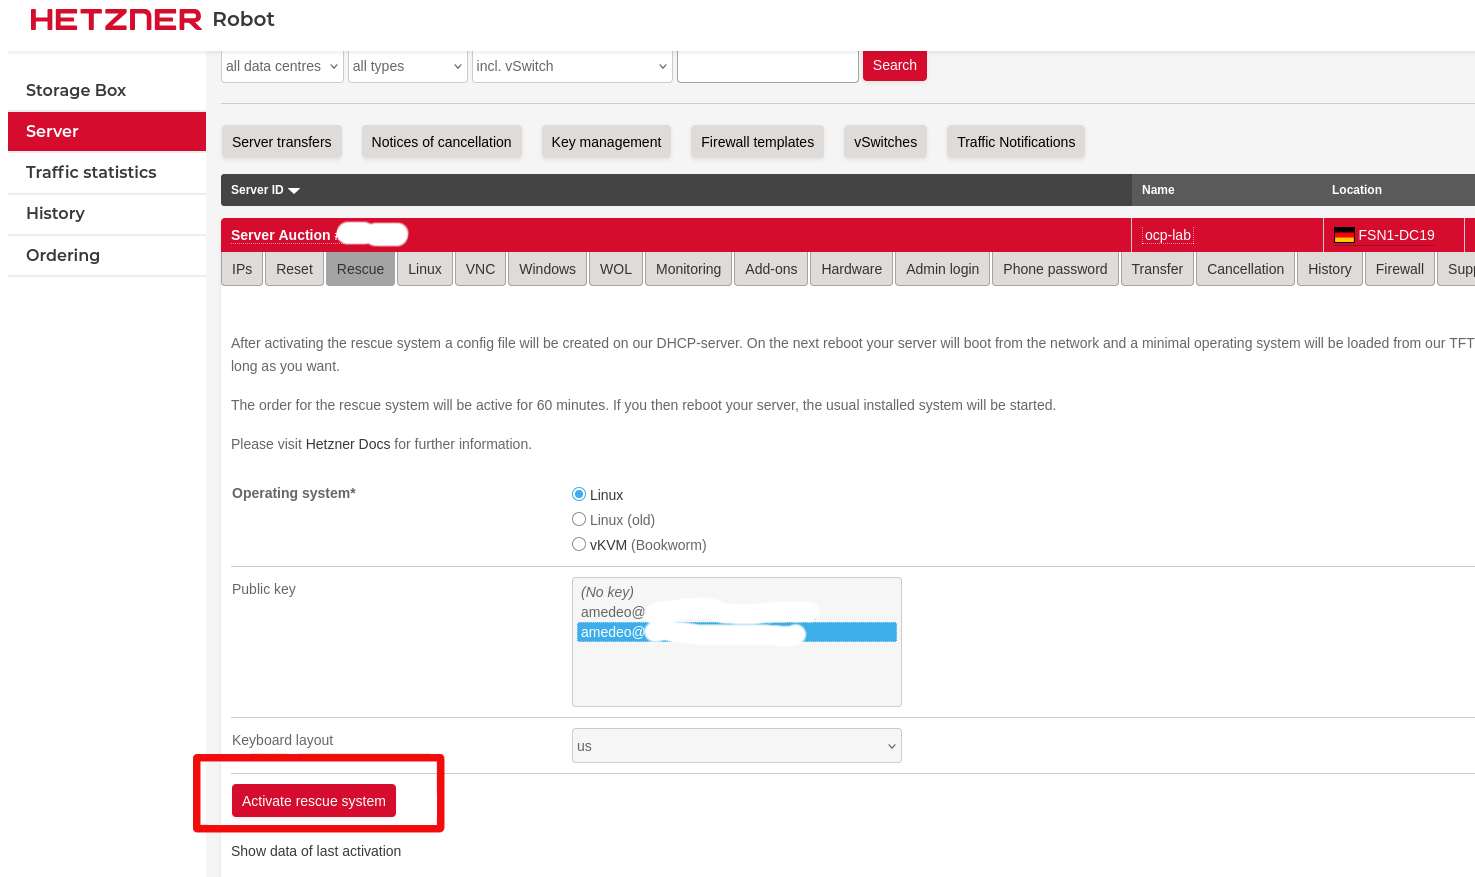
- Activate the Rescue system: log in to the Hetzner Robot, then go to Server → select your server → Rescue tab → choose Linux, select your public key, and click Activate rescue system:
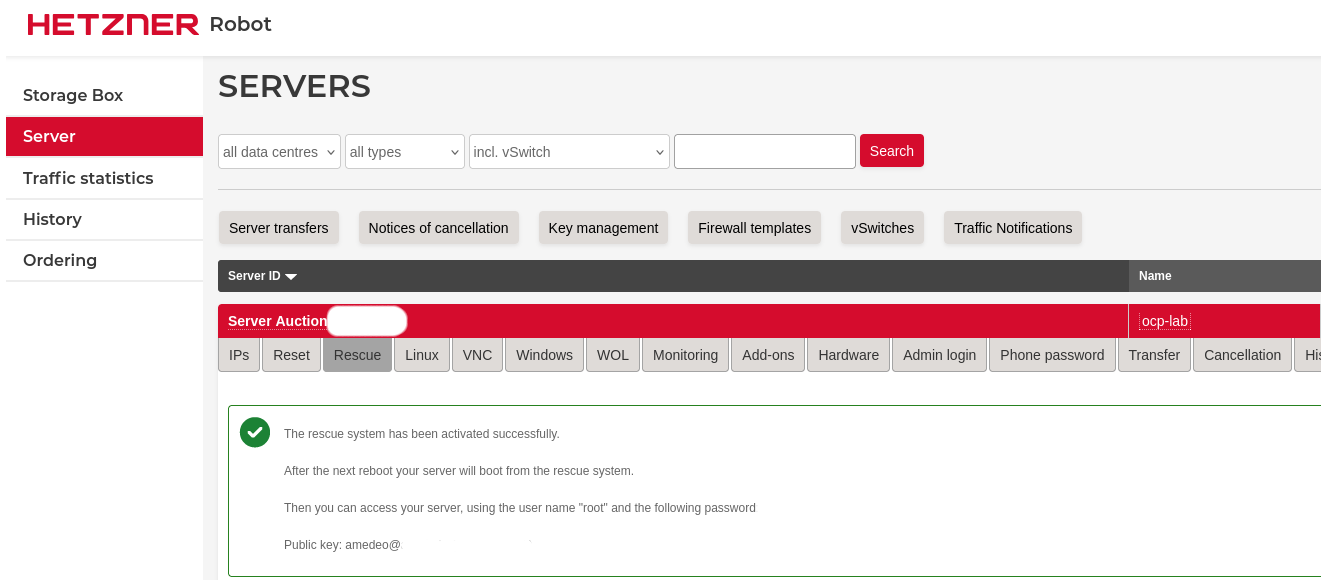
- Confirm that the rescue system is now armed for the next boot:
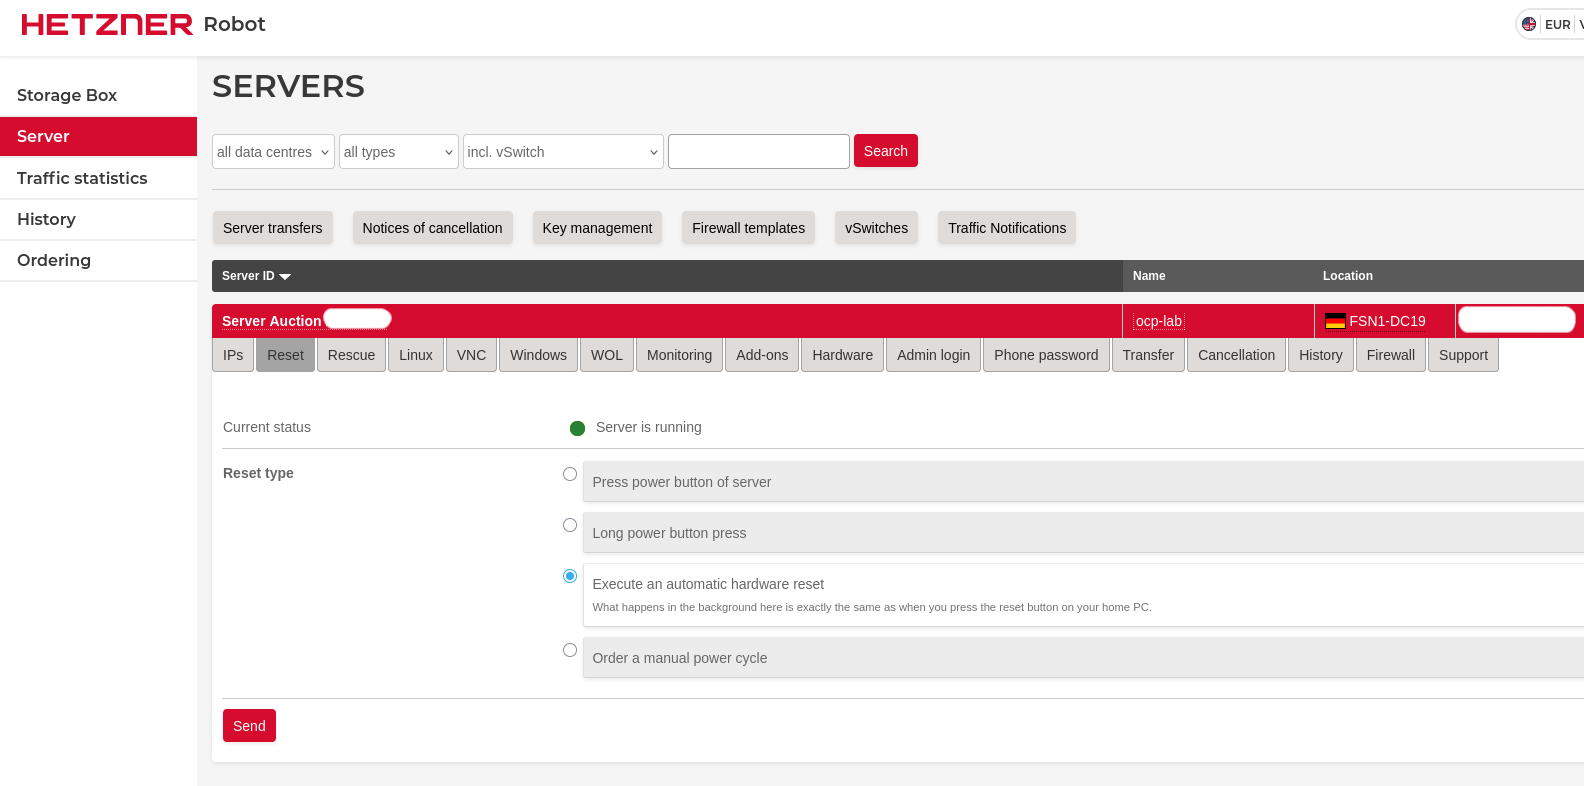
- Reboot into rescue mode. You can run
rebootover SSH, or send a hardware reset from the Robot: Reset tab → Execute an automatic hardware reset → Send:
- Wait for the server to come back up in rescue mode, then connect over SSH and wipe the start of the disk (this clears any previous partition table – destructive, make sure you are on the right machine):
root@rescue ~ # dd if=/dev/zero bs=1M count=10240 oflag=direct status=progress of=/dev/nvme0n1
- Launch
installimage:
root@rescue ~ # installimage
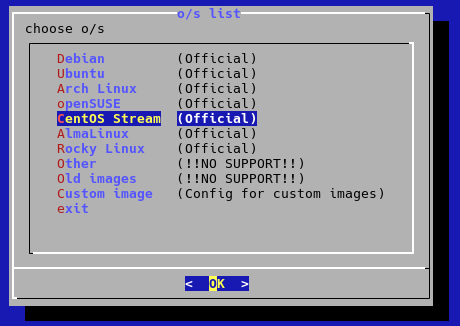
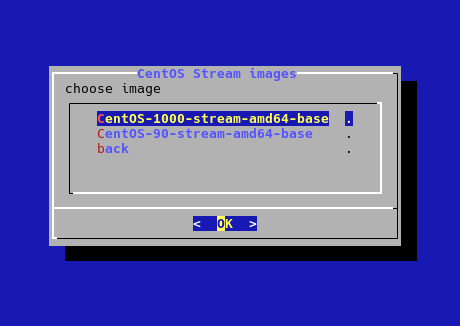
- Select CentOS Stream:
- Pick the latest CentOS Stream base image:
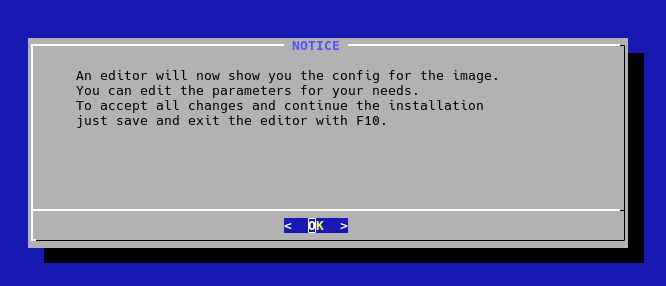
installimagewill now open an editor on the configuration file:
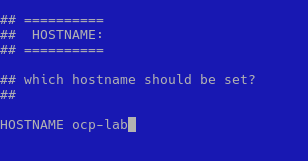
- Set the hostname to
ocp-lab:
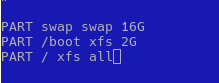
- Keep the partitioning simple – this is a lab, not production. A single root filesystem with some swap is plenty:
swap16 GB,/boot2 GB on XFS, and/taking all the remaining space on XFS:
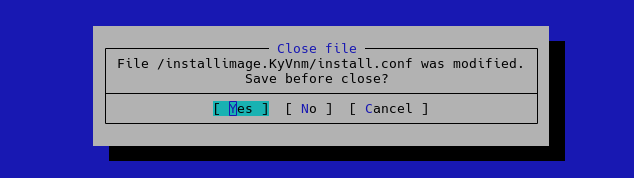
- Save and close the editor (
F10, then confirm):
- Confirm that the drive will be wiped and the installation can start:
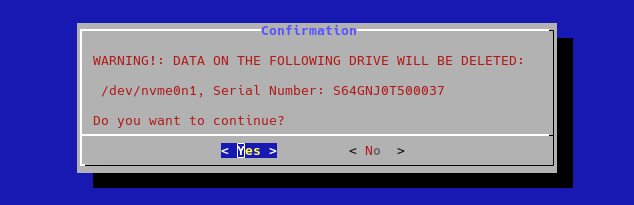
- When the installation finishes,
reboot. After it comes back, log in over SSH, update the system, and reboot once more if the kernel was updated:
[root@ocp-lab ~]# dnf update -y
[root@ocp-lab ~]# reboot
- Finally, install the tools we’ll need to run the automation:
[root@ocp-lab ~]# dnf install -y bash-completion git make tmux ansible-core openssl
Create a Red Hat activation key
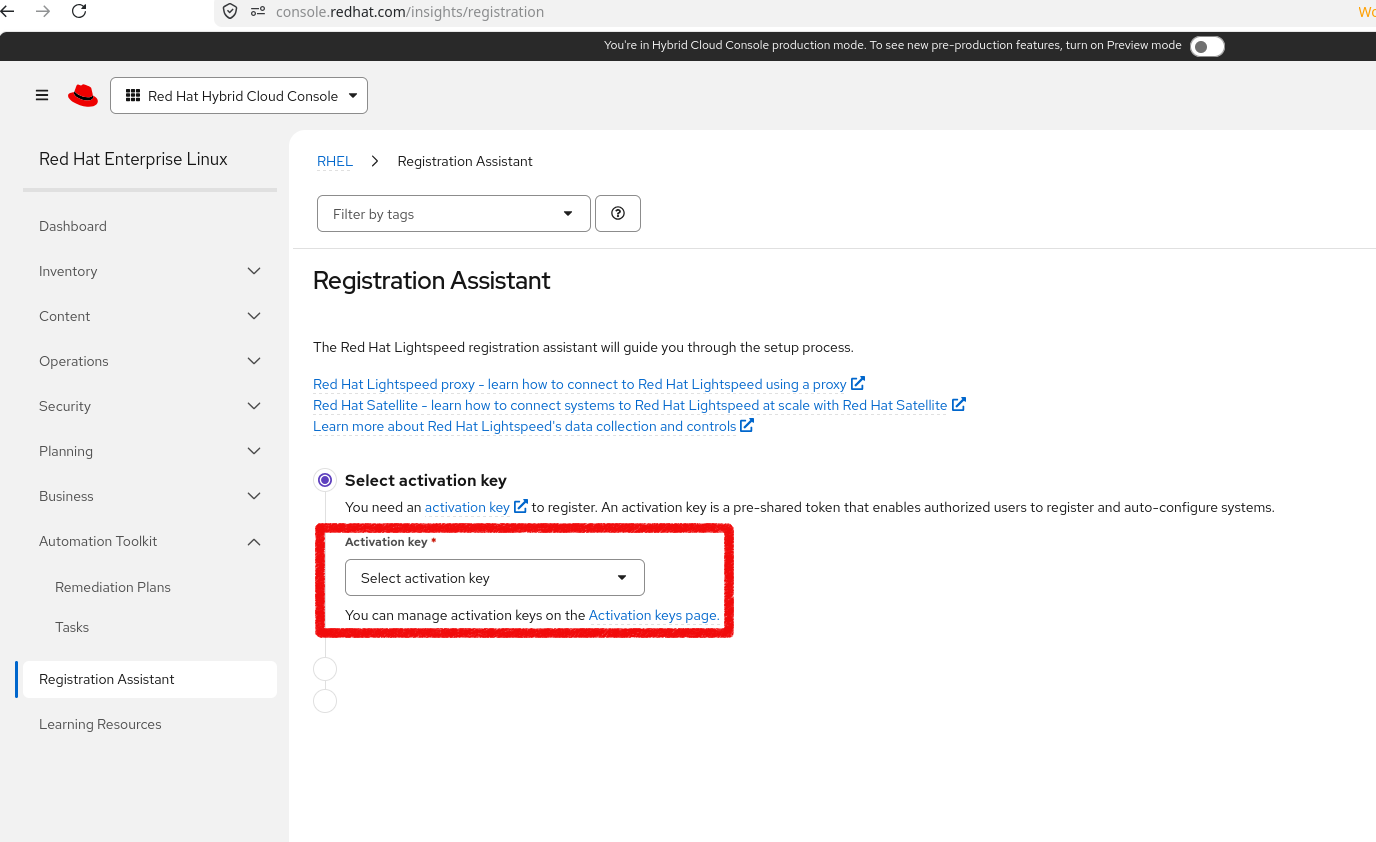
The utility and ceph VMs are RHEL 10, so they register with subscription-manager using an activation key and your organization ID. Create the key from the Registration Assistant:
- Open the Registration Assistant and choose Select activation key:
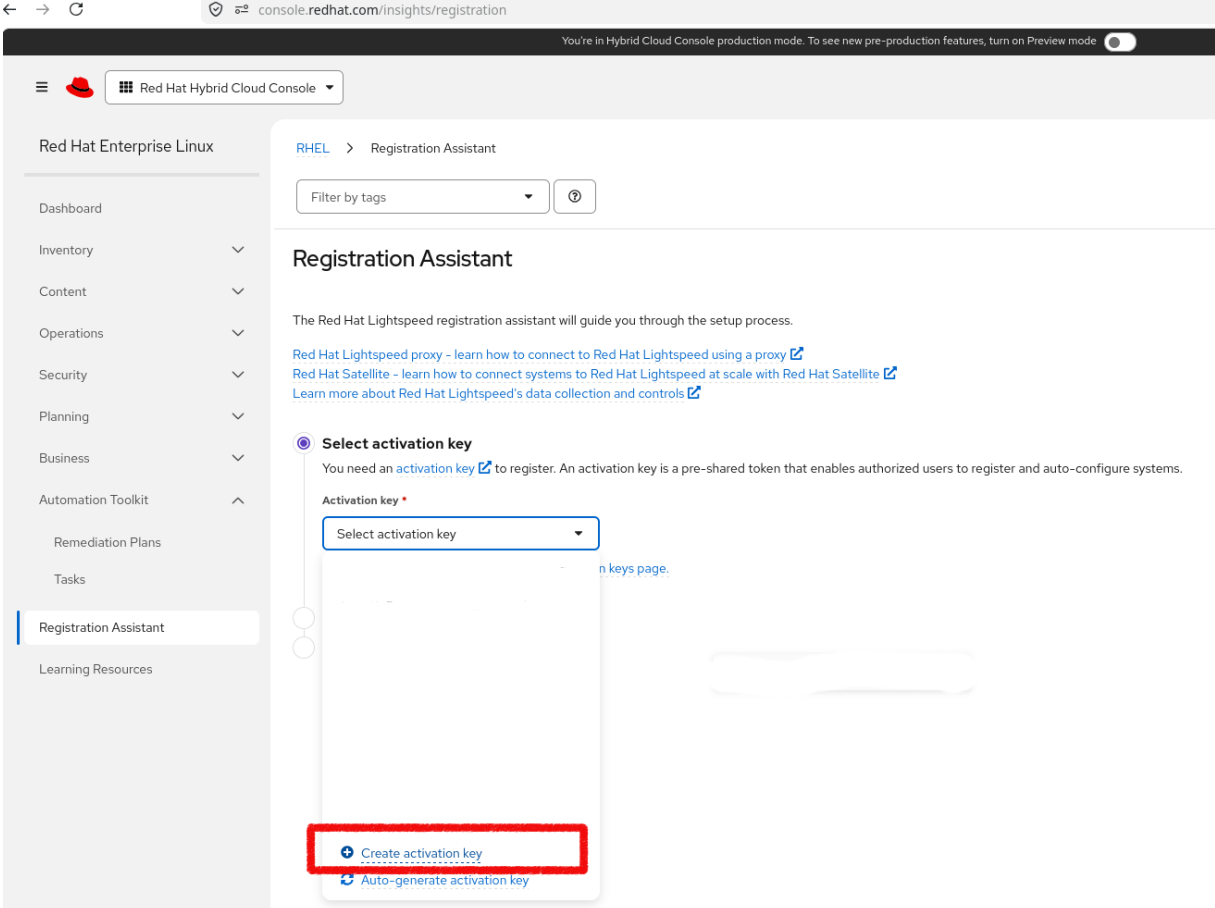
- Open the dropdown and click Create activation key:
- Give the key a name (you’ll reference it later as
rh_activation_key):
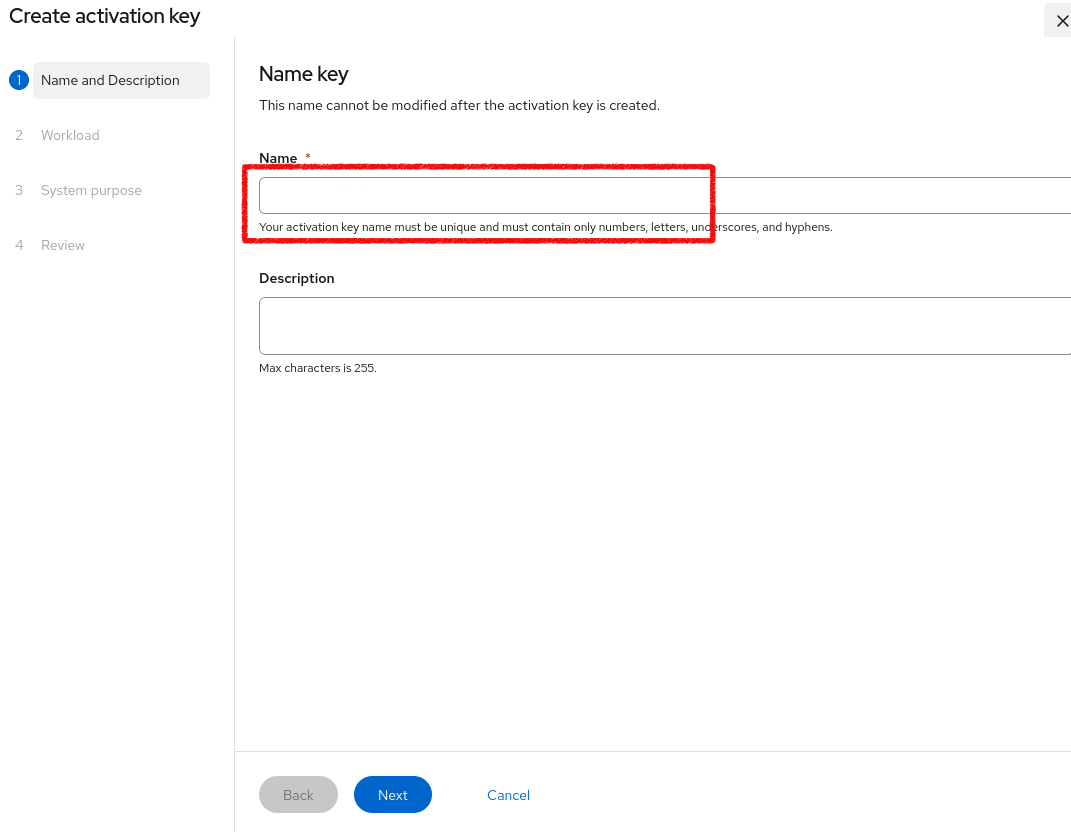
The key name has been blanked out in the screenshots for privacy. If you let the console auto-generate it, the name is a UUID-style string such as
9b587cd4-2ae8-44e9-8888-f732bd9fac48.
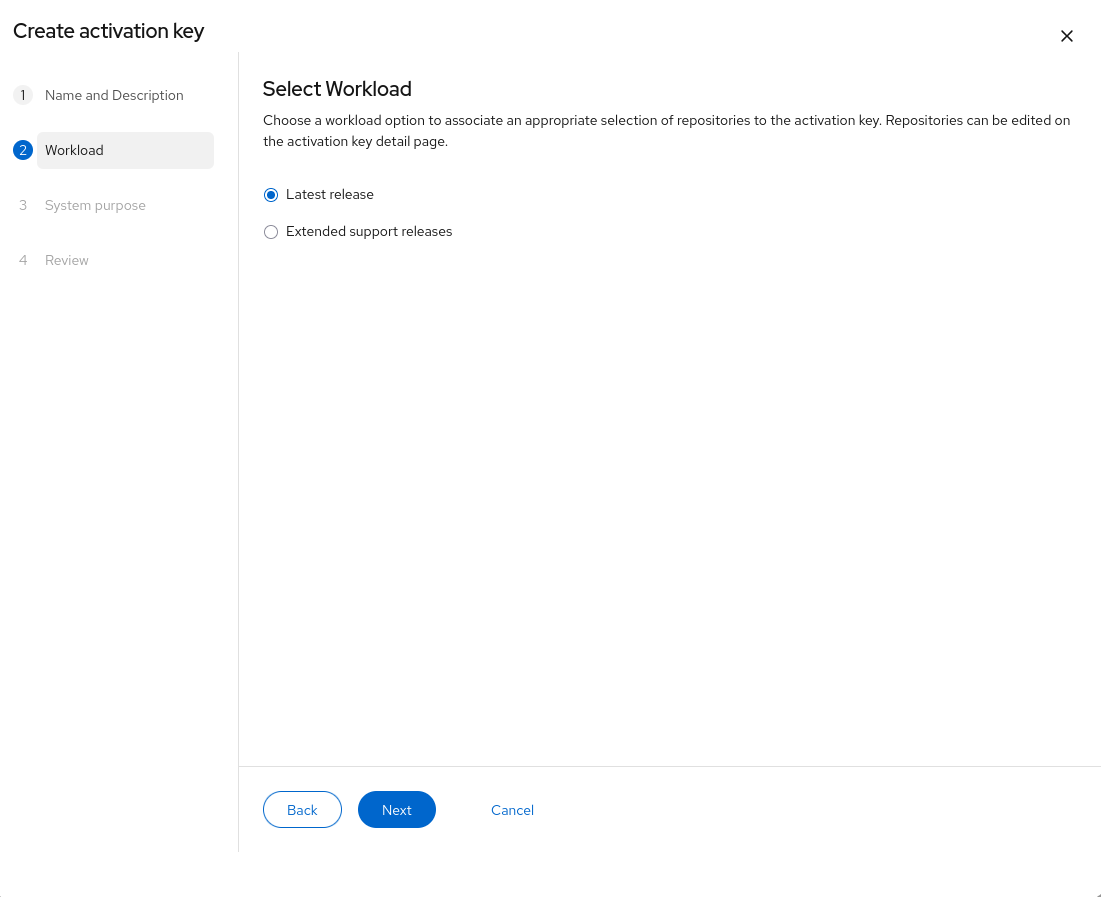
- Choose the Latest release workload:
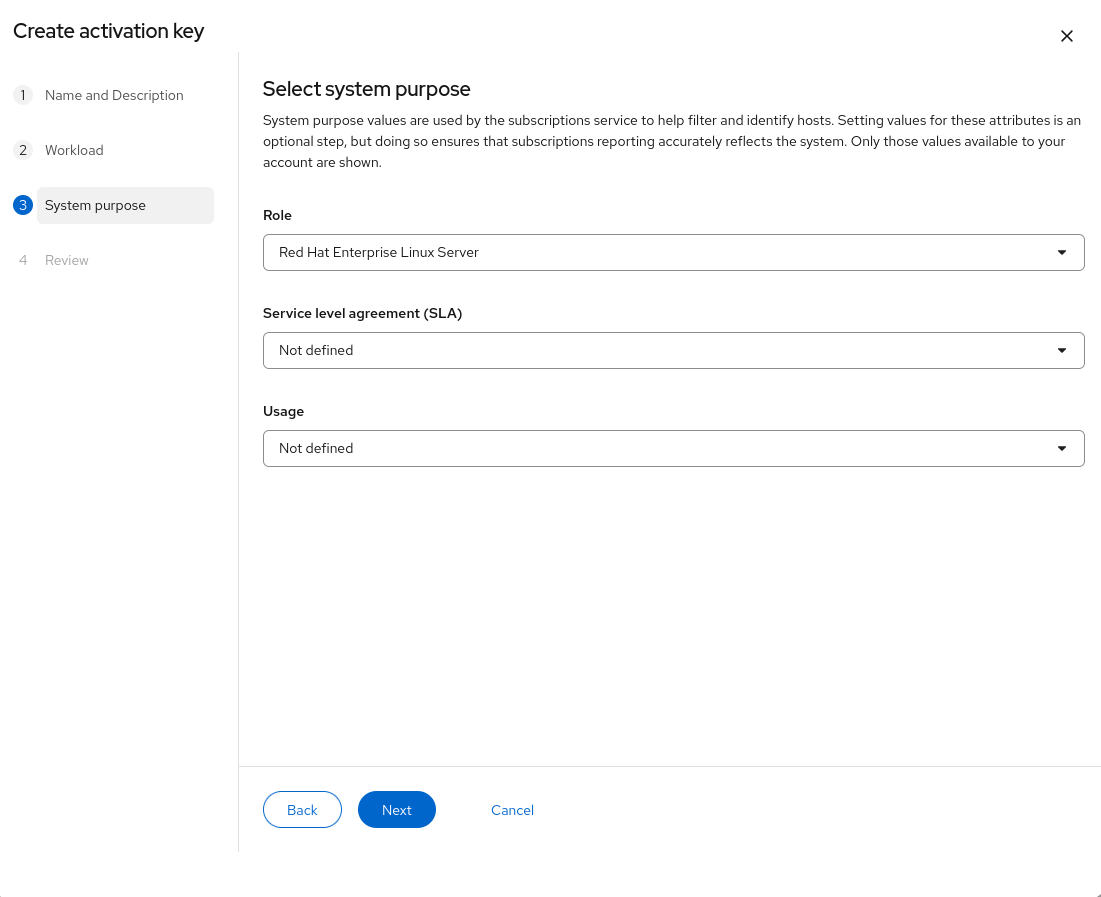
- Set the system purpose – Red Hat Enterprise Linux Server is fine for a lab; the SLA and usage can stay Not defined:
- Review and create the key:
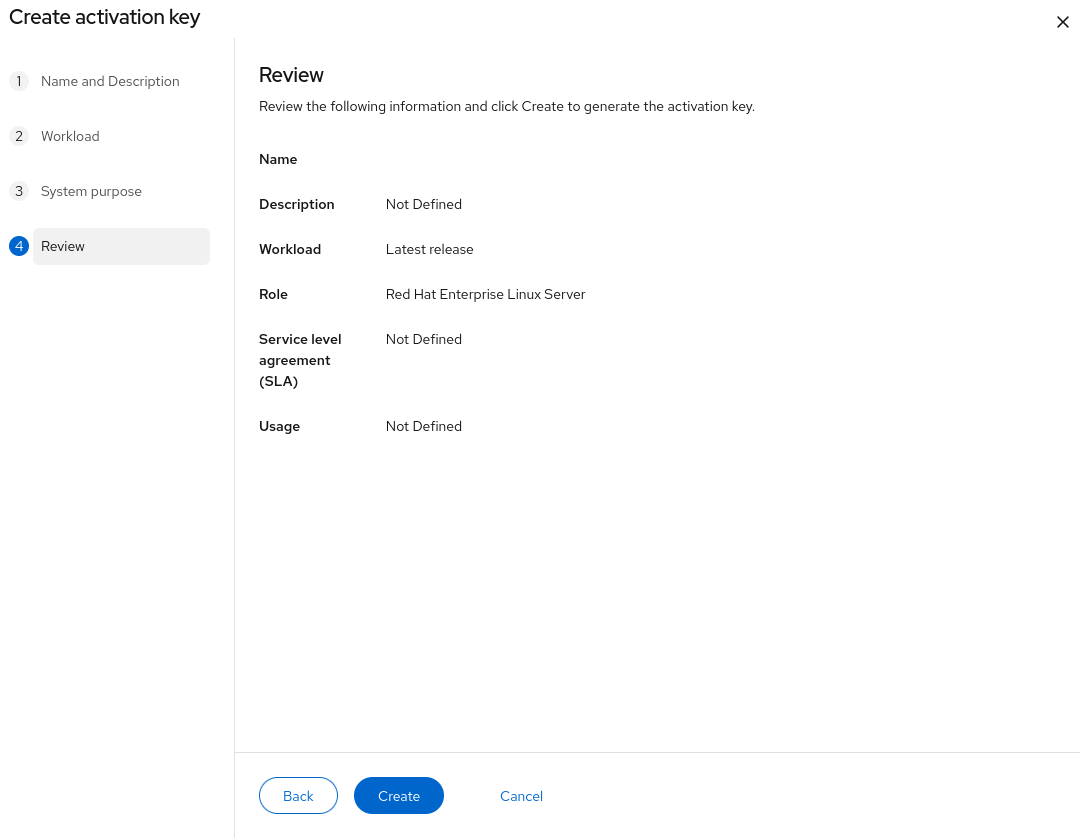
You’ll also need your organization ID, which is shown on the activation keys page.
Get the pull secret
From the OpenShift section of the console you can download the pull secret that Ceph/cephadm uses to pull container images from registry.redhat.io.
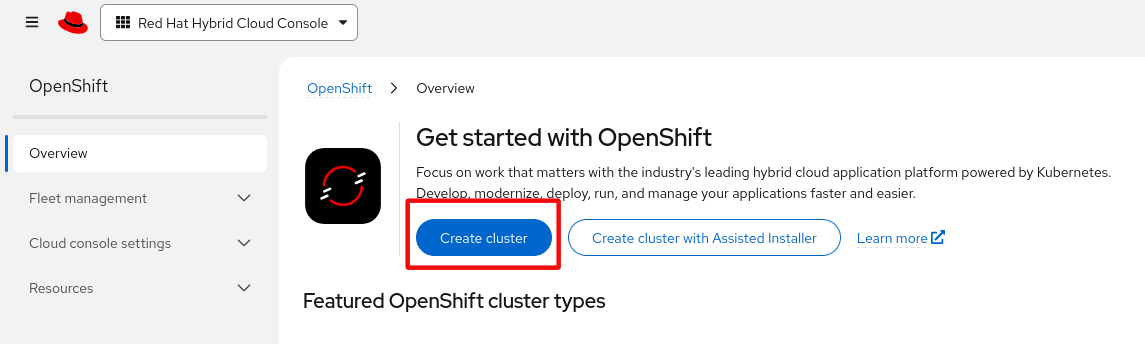
- On the OpenShift overview, the cluster types are reachable from here (we’ll use the Assisted Installer in a moment):
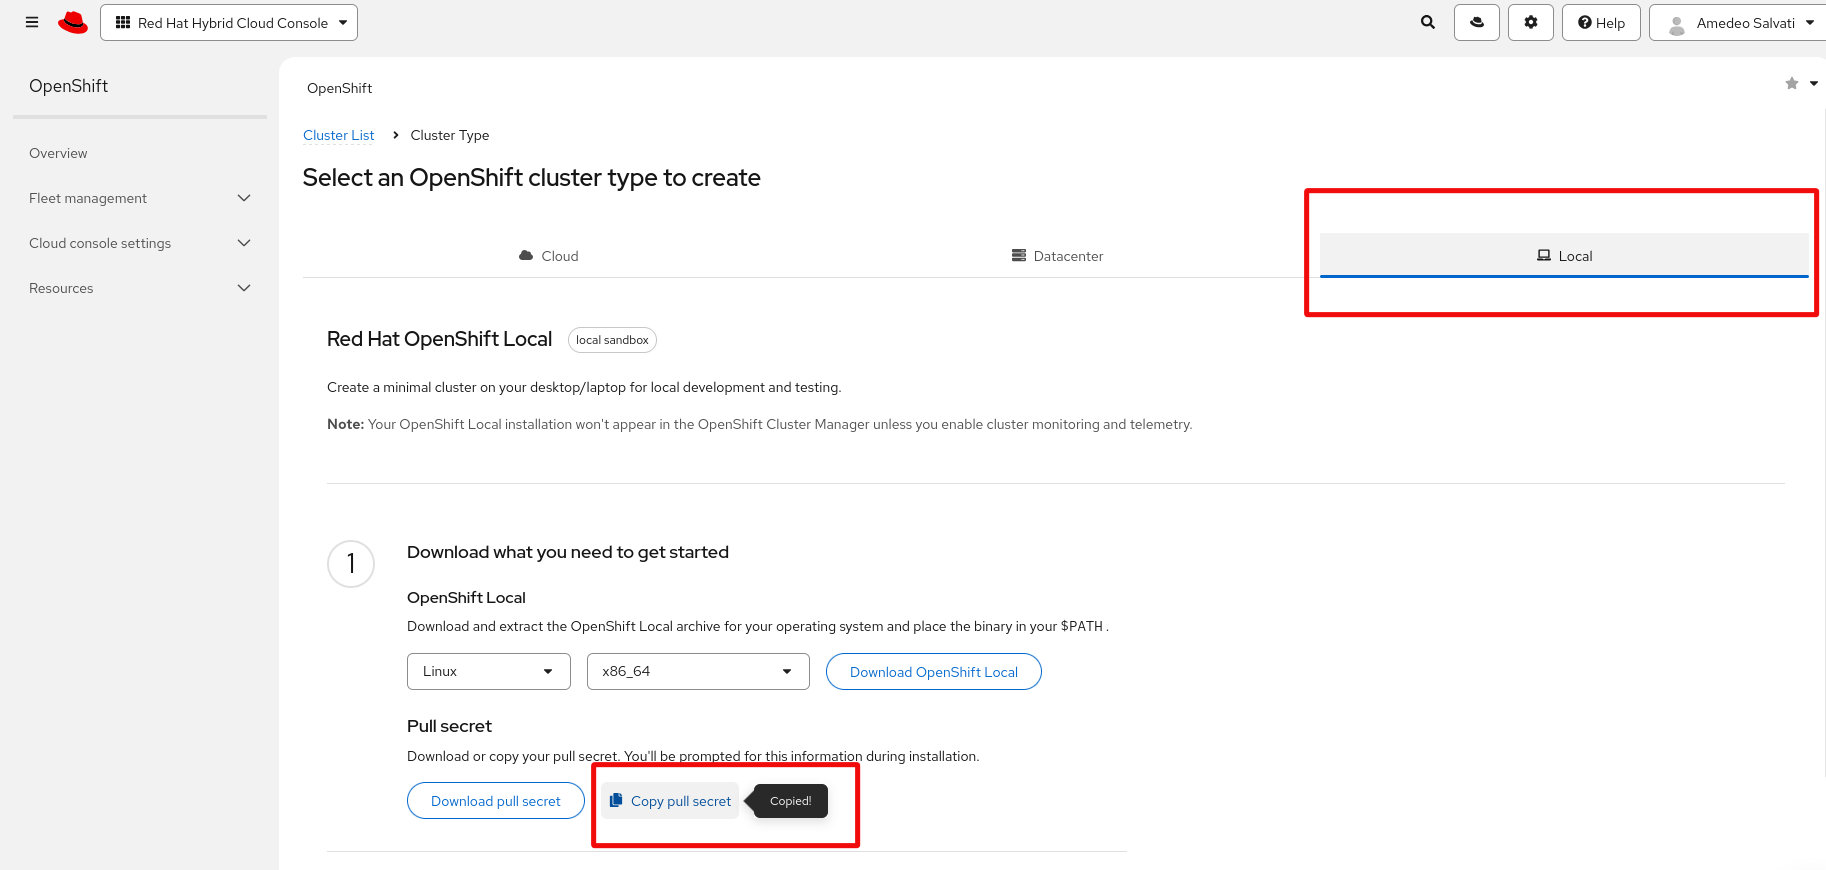
- The pull secret is available under any of the install flows. Here I opened the Local tab (highlighted in red), then used Download pull secret (or Copy pull secret) to save it for later:
Clone the automation and prepare the secrets
On the Hetzner server, work inside a tmux session (the deploy takes ~1 hour, and tmux keeps it alive if your SSH connection drops):
[root@ocp-lab ~]# tmux
[root@ocp-lab ~]# git clone https://github.com/amedeos/ocp-assisted-in-the-jars
[root@ocp-lab ~]# cd ocp-assisted-in-the-jars
- Install the required Ansible collections:
[root@ocp-lab ocp-assisted-in-the-jars]# make collections
- Create the vault with your secrets, starting from the example file:
[root@ocp-lab ocp-assisted-in-the-jars]# cp inventory/group_vars/all/vault.yml.example inventory/group_vars/all/vault.yml
[root@ocp-lab ocp-assisted-in-the-jars]# vi inventory/group_vars/all/vault.yml
Fill in:
| Variable | Value |
|---|---|
secure_password |
root password for the utility and ceph VMs |
rh_activation_key |
the activation key name created above |
rh_org_id |
your Red Hat organization ID |
htpasswd_admin_password |
password for the OpenShift admin user (e.g. openssl rand -hex 30) |
- Encrypt the vault. Remember the vault password – you’ll reuse the same one for the pull secret and for every
maketarget that needs it:
[root@ocp-lab ocp-assisted-in-the-jars]# make vault-encrypt
- Drop in the pull secret you downloaded earlier and encrypt it with the same vault password:
[root@ocp-lab ocp-assisted-in-the-jars]# vi files/pull-secret.txt        # paste the pull secret
[root@ocp-lab ocp-assisted-in-the-jars]# cat files/pull-secret.txt | jq .  # sanity check the JSON
[root@ocp-lab ocp-assisted-in-the-jars]# make pull-secret-encrypt
Both
vault.ymlandpull-secret.txtare gitignored – they never end up in the repository.
Prepare the hypervisor and the network
These two targets touch the host (nested virtualization, packages, iptables, the libvirt network), so you run them once, explicitly. make deploy never modifies the hypervisor on its own.
[root@ocp-lab ocp-assisted-in-the-jars]# make prepare-hypervisor   # nested virt, base virt packages, NAT/port-forwarding
[root@ocp-lab ocp-assisted-in-the-jars]# make prepare-network      # libvirt NAT network + DNAT for 443/6443
In NAT mode the API and Ingress VIPs are exposed through the hypervisor’s public IP via port-forwarding (443 and 6443), so you can reach the cluster from outside without a public route to the lab subnet.
- Place the RHEL 10 image where the automation expects it, and verify its checksum:
[root@ocp-lab ocp-assisted-in-the-jars]# mkdir -p /root/images
# from your laptop:
$ scp rhel-10.2-x86_64-kvm.qcow2 root@<HYPERVISOR_PUBLIC_IP>:/root/images/
# back on the server:
[root@ocp-lab ocp-assisted-in-the-jars]# sha256sum /root/images/rhel-10.2-x86_64-kvm.qcow2
- Run the read-only pre-flight checks. They validate KVM, nested virt, the network, disk and memory:
[root@ocp-lab ocp-assisted-in-the-jars]# make preflight
...
        "All pre-flight checks passed on localhost",
        "  KVM: OK",
        "  libvirtd: OK",
        "  Network (nat): OK",
        "  IP forwarding: OK",
        "  Nested virt: OK",
        "  Disk space: 1754G available",
        "  Memory: 128151MB RAM + 16383MB swap = 144534MB (118784MB required)",
        "  Base image: OK"
- Generate the SSH key pair the Assisted Installer will inject into the nodes, and print the public key (you’ll paste it into the wizard):
[root@ocp-lab ocp-assisted-in-the-jars]# make ssh-key
[root@ocp-lab ocp-assisted-in-the-jars]# cat files/.ssh/id_rsa.pub
Create the cluster on console.redhat.com
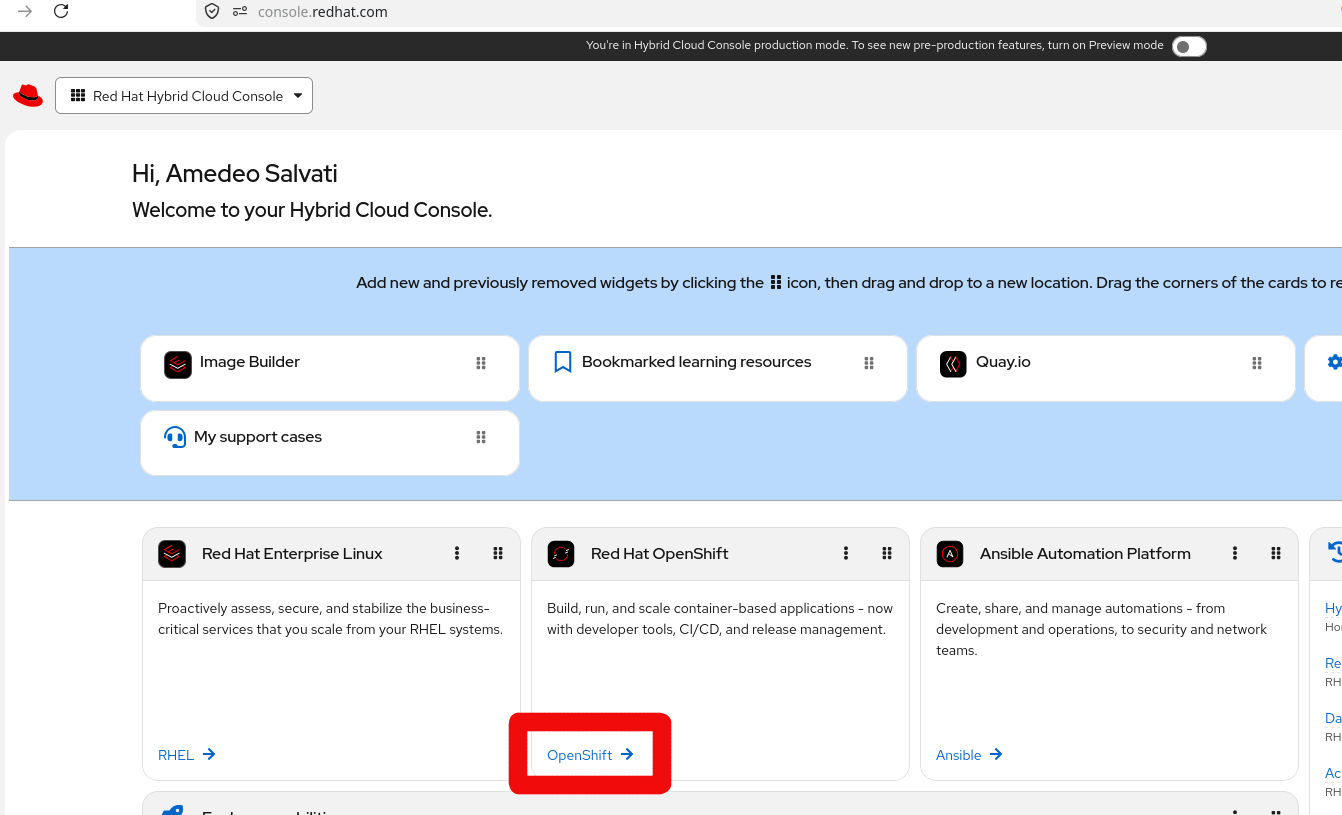
Now the Assisted Installer part. Go to the Hybrid Cloud Console and open the OpenShift section:
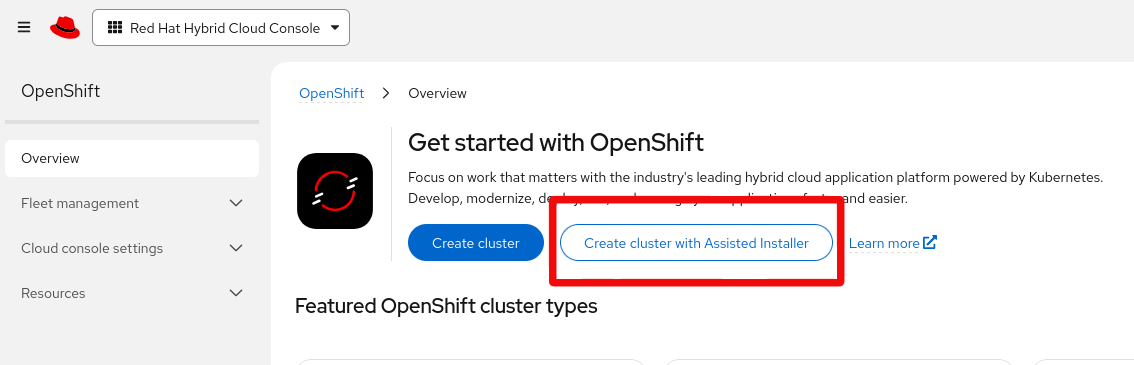
- Choose Create cluster with Assisted Installer:
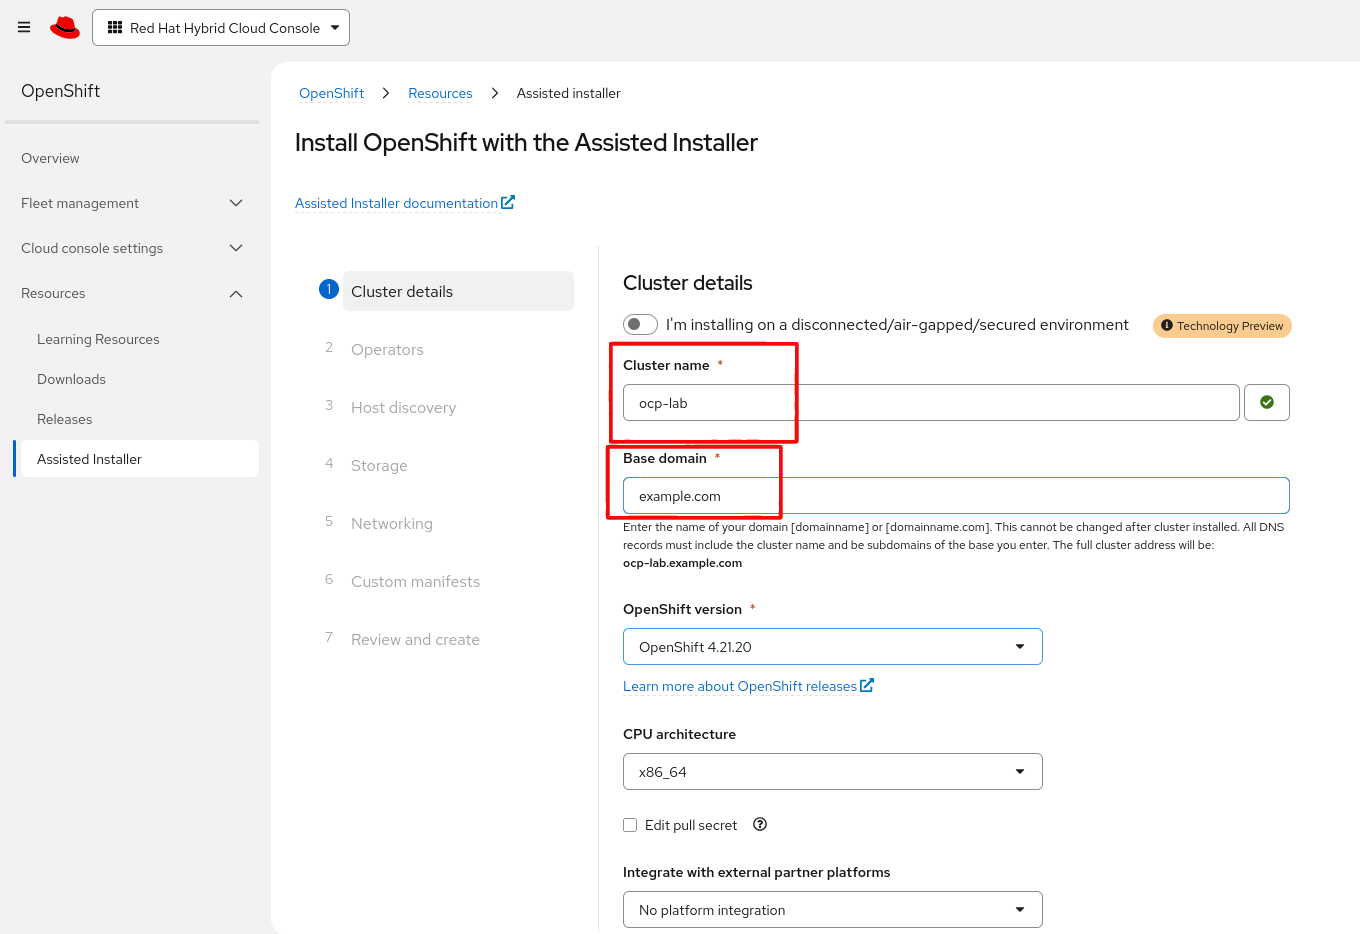
- Fill in the cluster details: name
ocp-lab, base domainexample.com(so the cluster address isocp-lab.example.com), and pick the OpenShift version:
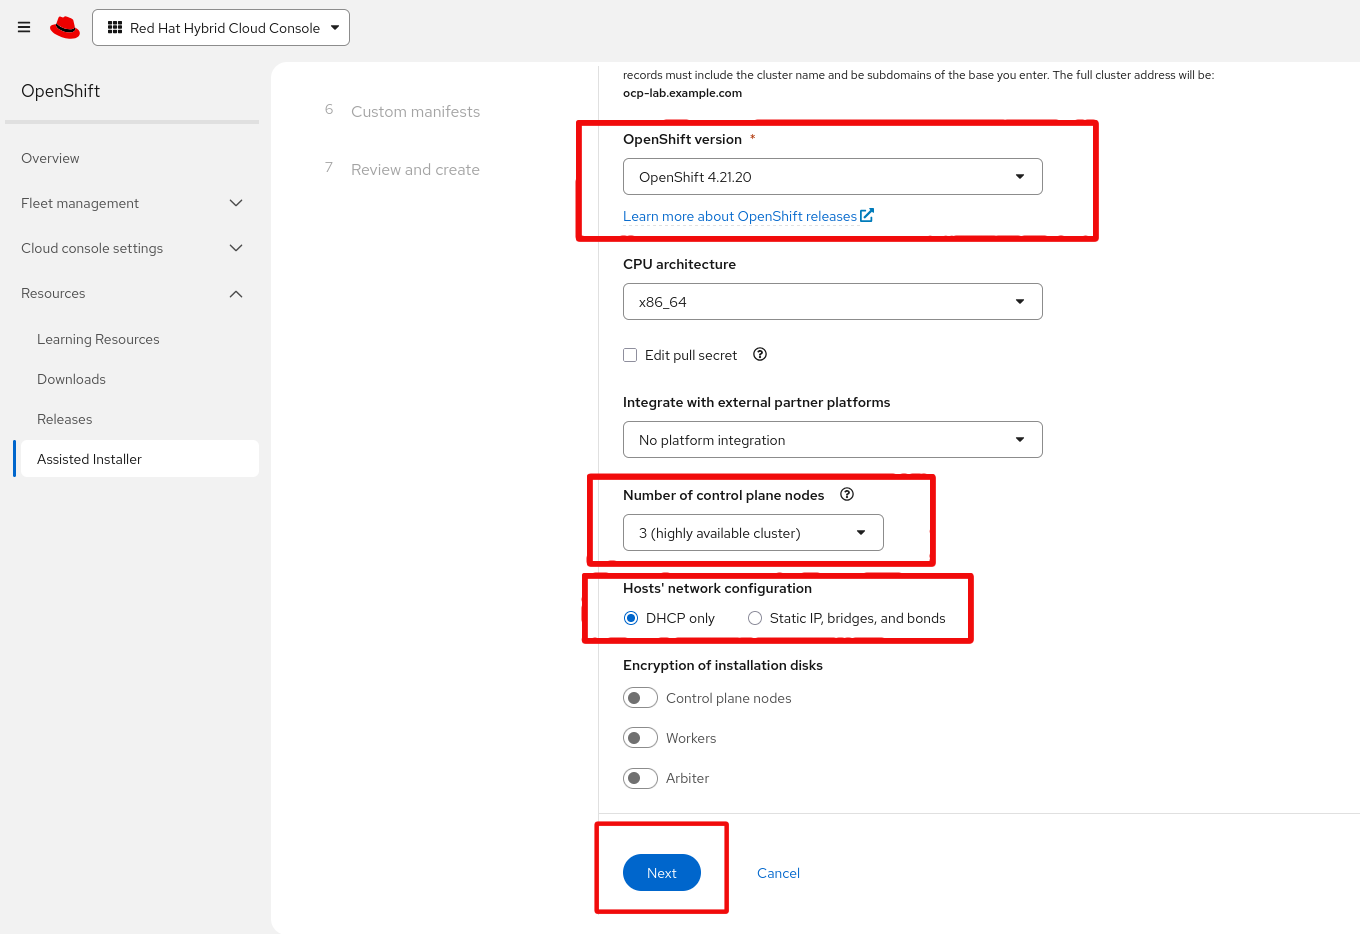
- Keep 3 control plane nodes (a highly-available, compact cluster) and DHCP only for the hosts’ network configuration – the
utilityVM serves DHCP on the lab network:
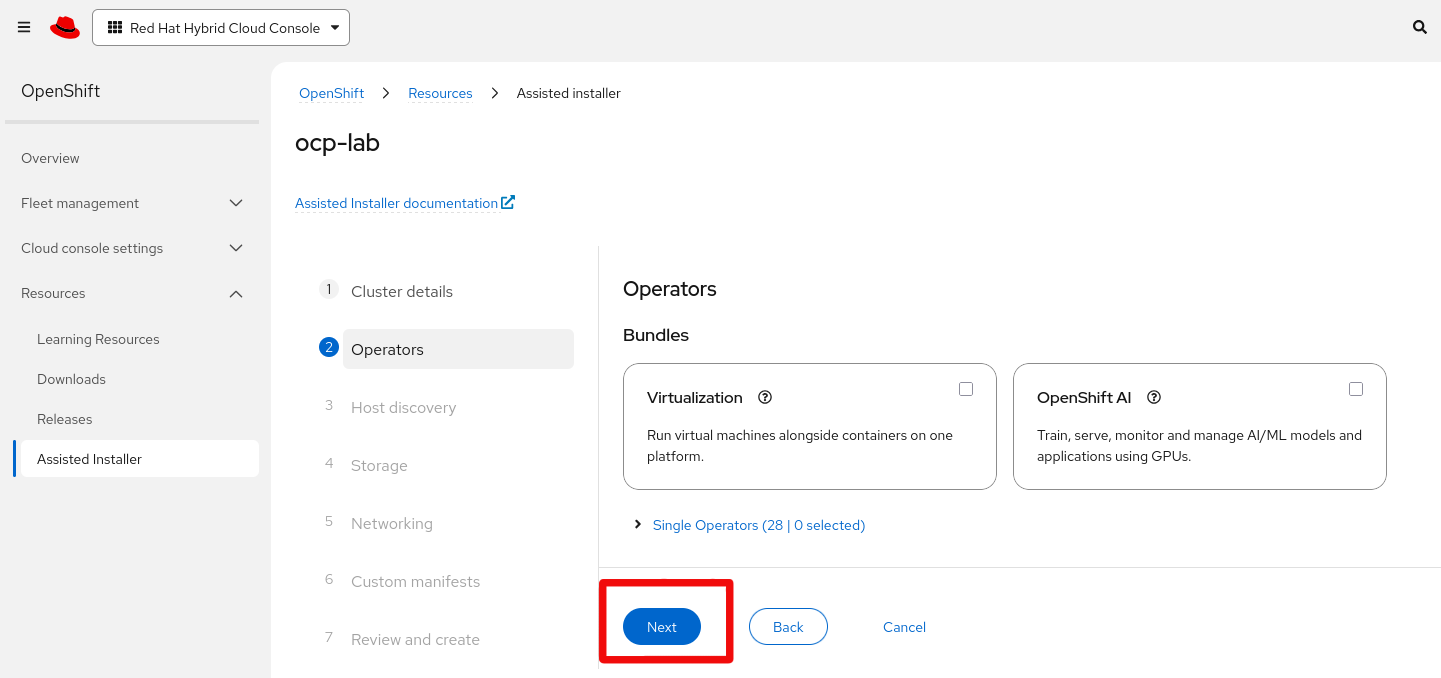
- On the Operators step you can leave the bundles unselected (we install ODF later from the automation) and continue:
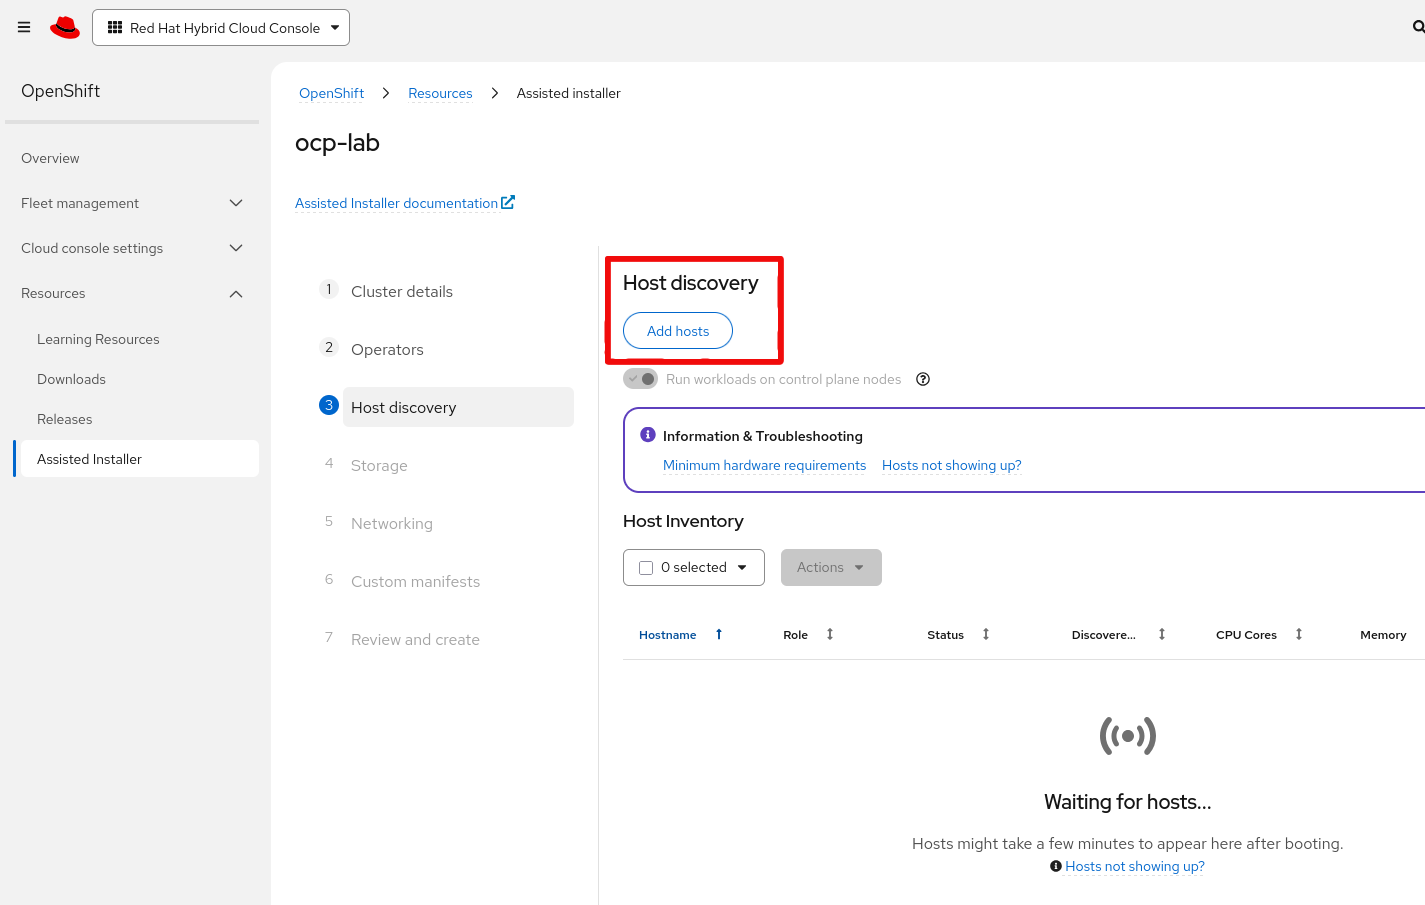
- On Host discovery, click Add hosts:
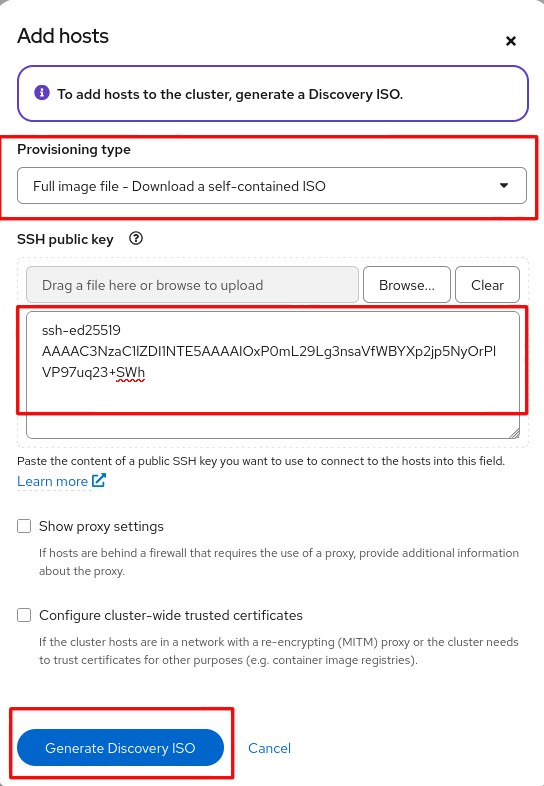
- Choose the Full image file provisioning type, paste the SSH public key you printed earlier (
files/.ssh/id_rsa.pub), and click Generate Discovery ISO:
- Copy the
wgetcommand to download the ISO. On the Hetzner server, fetch it into the images directory:
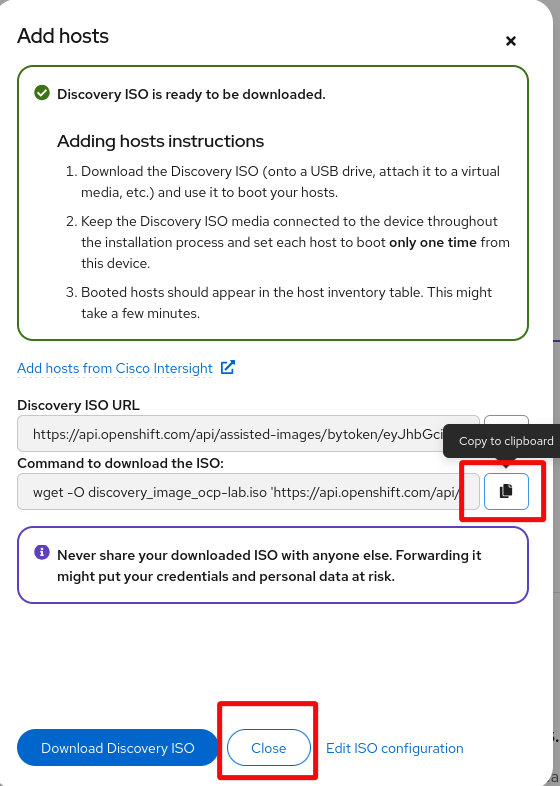
[root@ocp-lab ocp-assisted-in-the-jars]# cd /root/images/
[root@ocp-lab images]# wget -O discovery_image_ocp-lab.iso '<DISCOVERY_ISO_URL_FROM_THE_CONSOLE>'
The discovery ISO URL contains a token tied to your account, and the ISO embeds your pull secret. Never share the URL or the ISO – treat them like a password.
Deploy the lab
Back in the repository, start the full deployment. This creates and configures the utility and ceph VMs, bootstraps Ceph with its OSDs, and creates the three (still empty) control-plane VMs:
[root@ocp-lab ocp-assisted-in-the-jars]# cd /root/ocp-assisted-in-the-jars/
[root@ocp-lab ocp-assisted-in-the-jars]# make deploy
At some point the playbook pauses and waits for you to confirm that the cluster exists on the console and that the discovery ISO is in place:
TASK [Confirm cluster creation on console.redhat.com]
Before proceeding, ensure you have:
  1. Created the cluster on console.redhat.com (Assisted Installer)
  2. Added the SSH public key to the cluster configuration
  3. Generated the discovery ISO
  4. Copied the ISO to /var/lib/libvirt/images/discovery-image.iso
Press ENTER to continue or Ctrl+C to abort:
- In another shell, copy the ISO you downloaded into the path the playbook expects, then go back and press ENTER:
[root@ocp-lab ~]# cp /root/images/discovery_image_ocp-lab.iso /var/lib/libvirt/images/discovery-image.iso
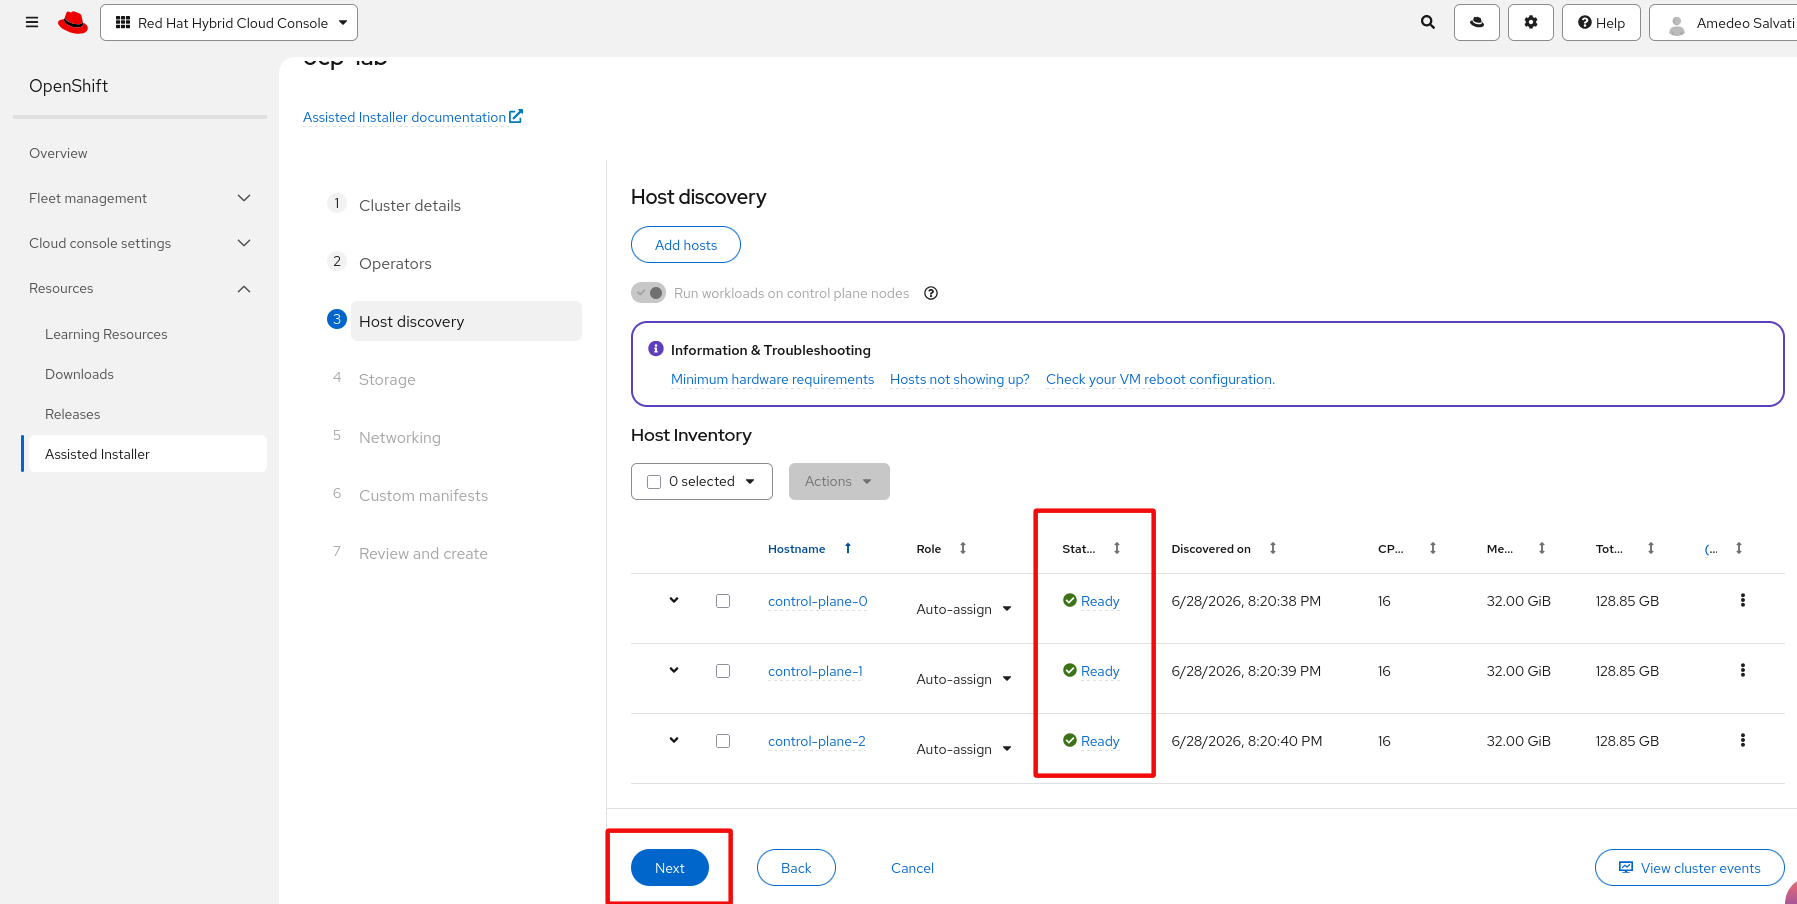
The playbook boots the control-plane VMs from the ISO. A short while later, the three hosts register on the console and report Ready – click Next:
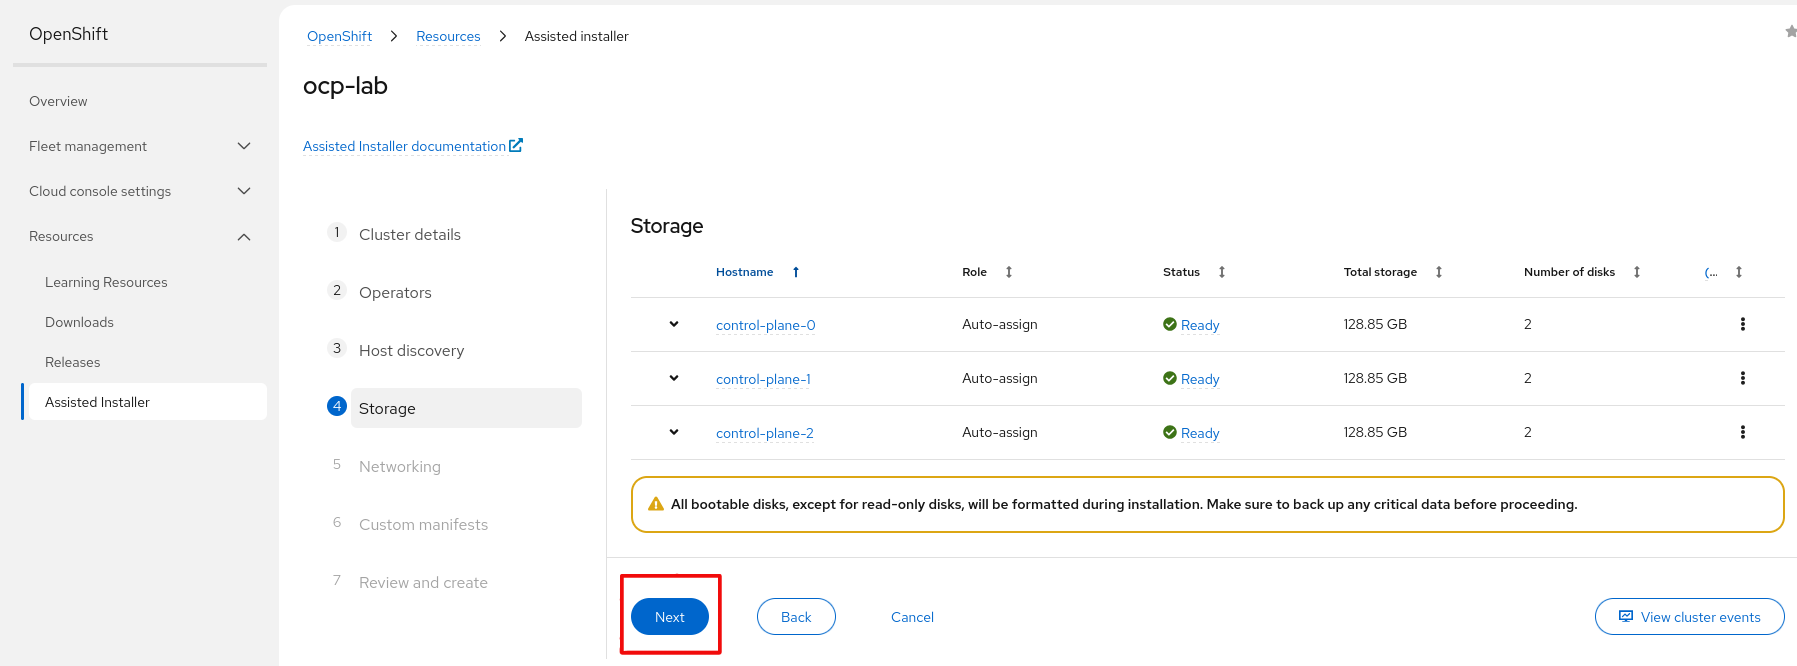
- On Storage, the discovered disks are shown – leave the defaults and click Next (ODF will use external Ceph, not these disks):
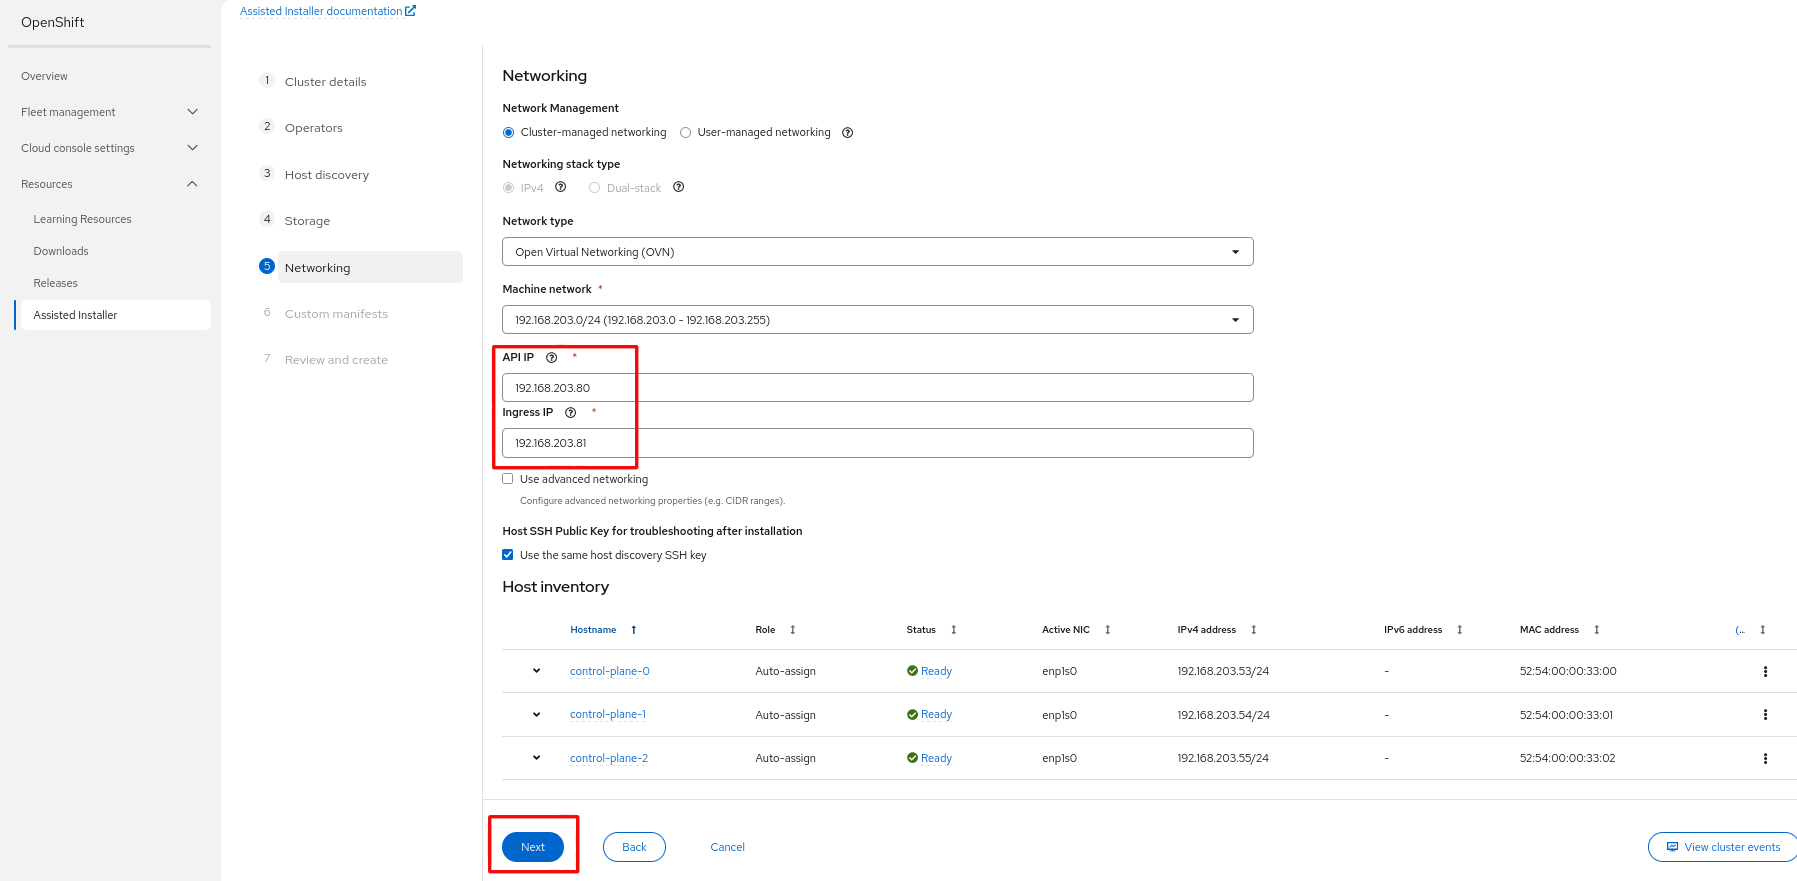
- On Networking, keep cluster-managed networking, set the API VIP (
192.168.203.80) and Ingress VIP (192.168.203.81), then click Next:
- Custom manifests can be left disabled; click Next:

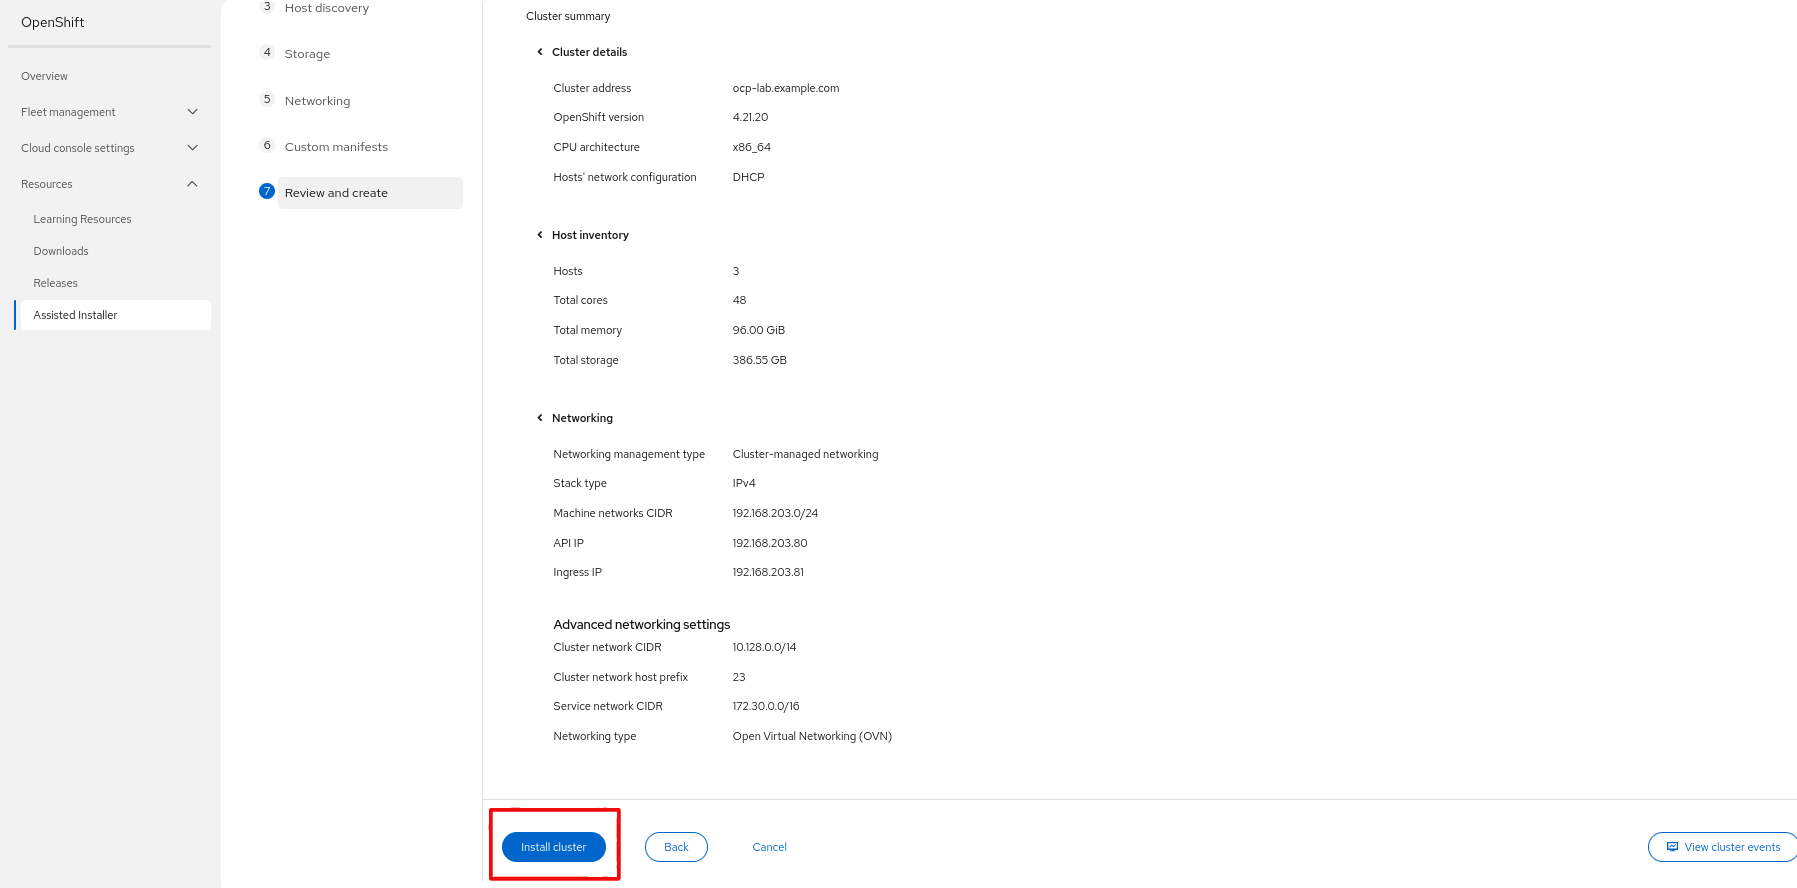
- Review and create, then click Install cluster:
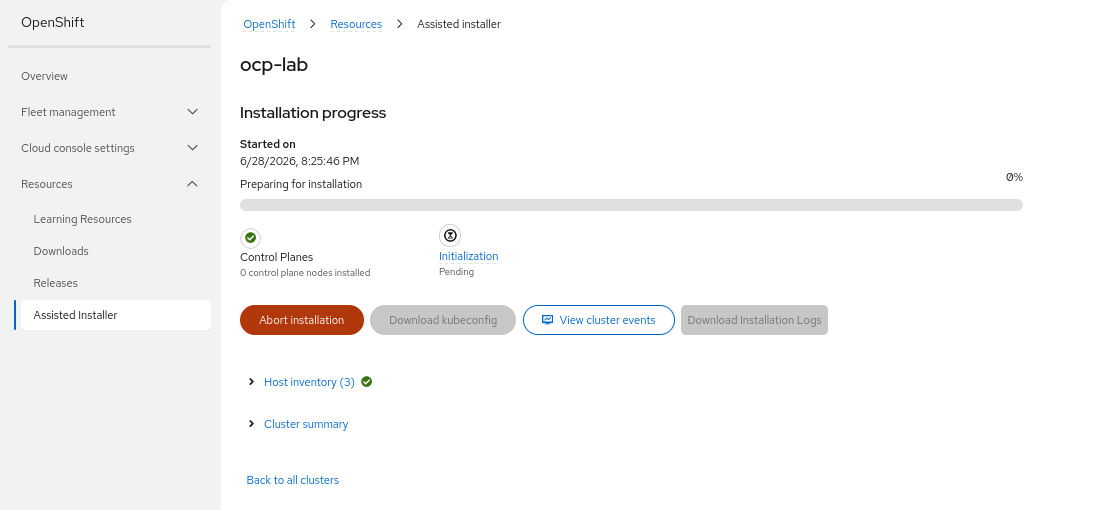
The installation kicks off:
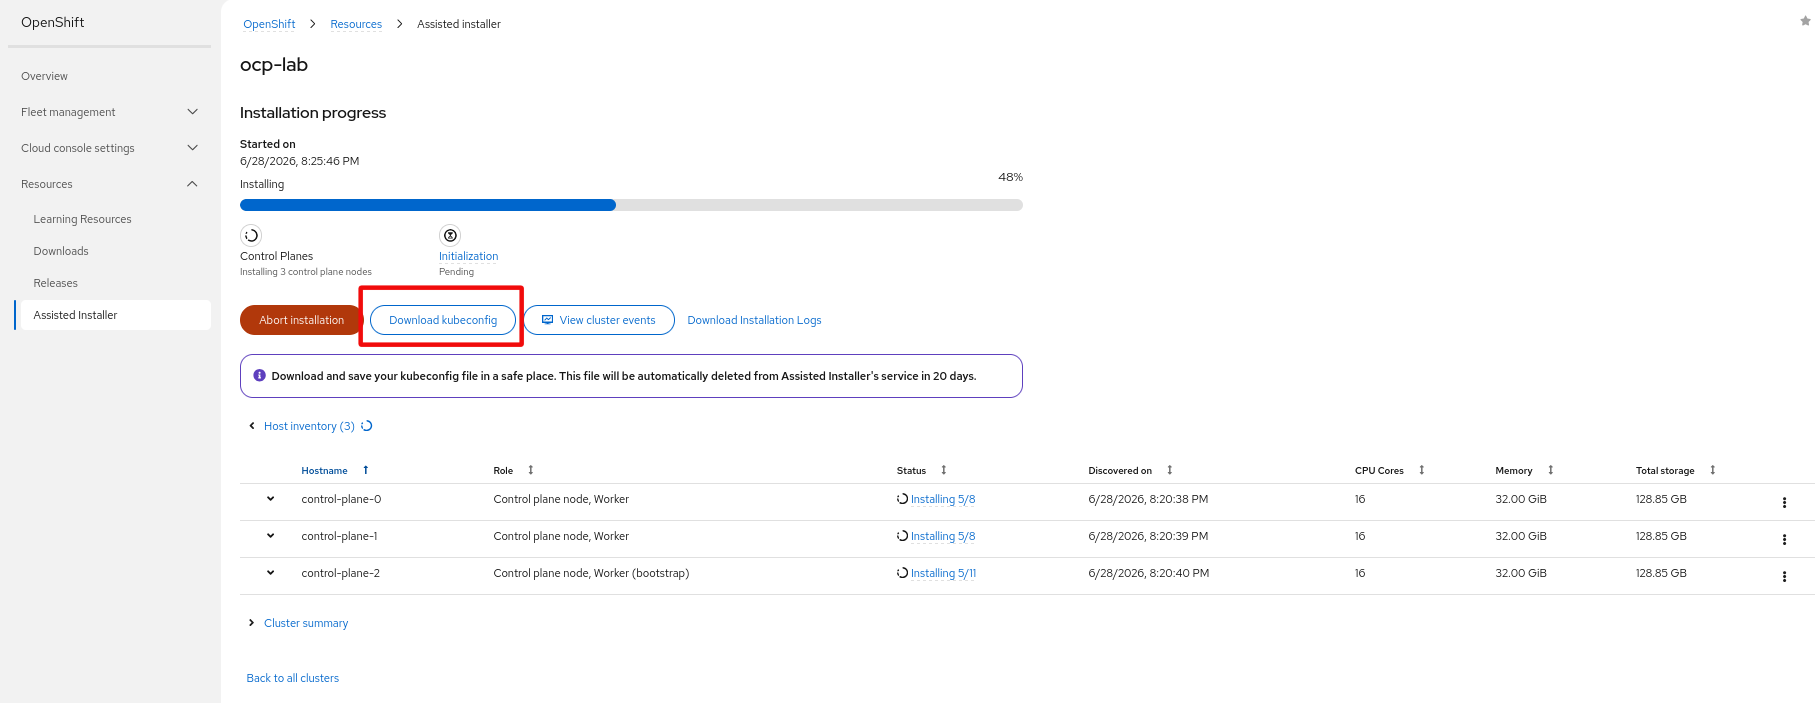
Part-way through the installation the console enables the Download kubeconfig button. You can grab it if you want early oc access to the cluster, but you don’t have to – at the end the automation configures the HTPasswd identity provider, so you’ll be able to log in with the admin user and the password from your vault:
After ~30-40 minutes the console reports Installation completed successfully, and you get the web console URL plus the temporary kubeadmin credentials:
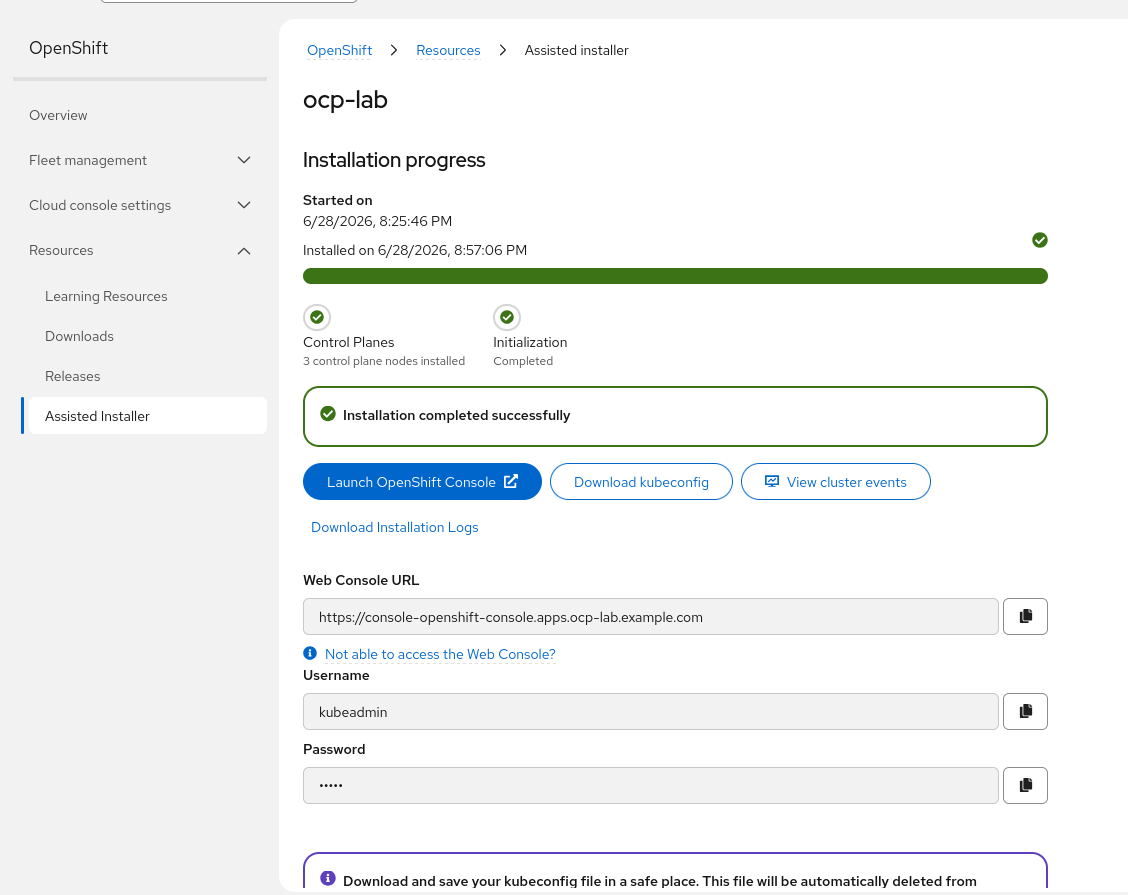
You don’t need to save the kubeadmin password, though: once the cluster is up the automation configures the HTPasswd identity provider and then removes the kubeadmin user, so from that point on you log in with the admin user and the password from your vault.
Meanwhile the make deploy playbook has been watching for the API VIP. Once the cluster is up it continues automatically to:
- install the
occlient and fetch the kubeconfig on theutilityVM; - configure the HTPasswd identity provider (the
adminuser useshtpasswd_admin_passwordfrom your vault); - install ODF in external mode backed by the
cephVM.
When everything is done, the playbook prints the /etc/hosts entries you need to reach the console and API from your workstation:
Add these entries to /etc/hosts on the machine where you open the console:

<HYPERVISOR_PUBLIC_IP> console-openshift-console.apps.ocp-lab.example.com oauth-openshift.apps.ocp-lab.example.com
<HYPERVISOR_PUBLIC_IP> api.ocp-lab.example.com
Access the cluster
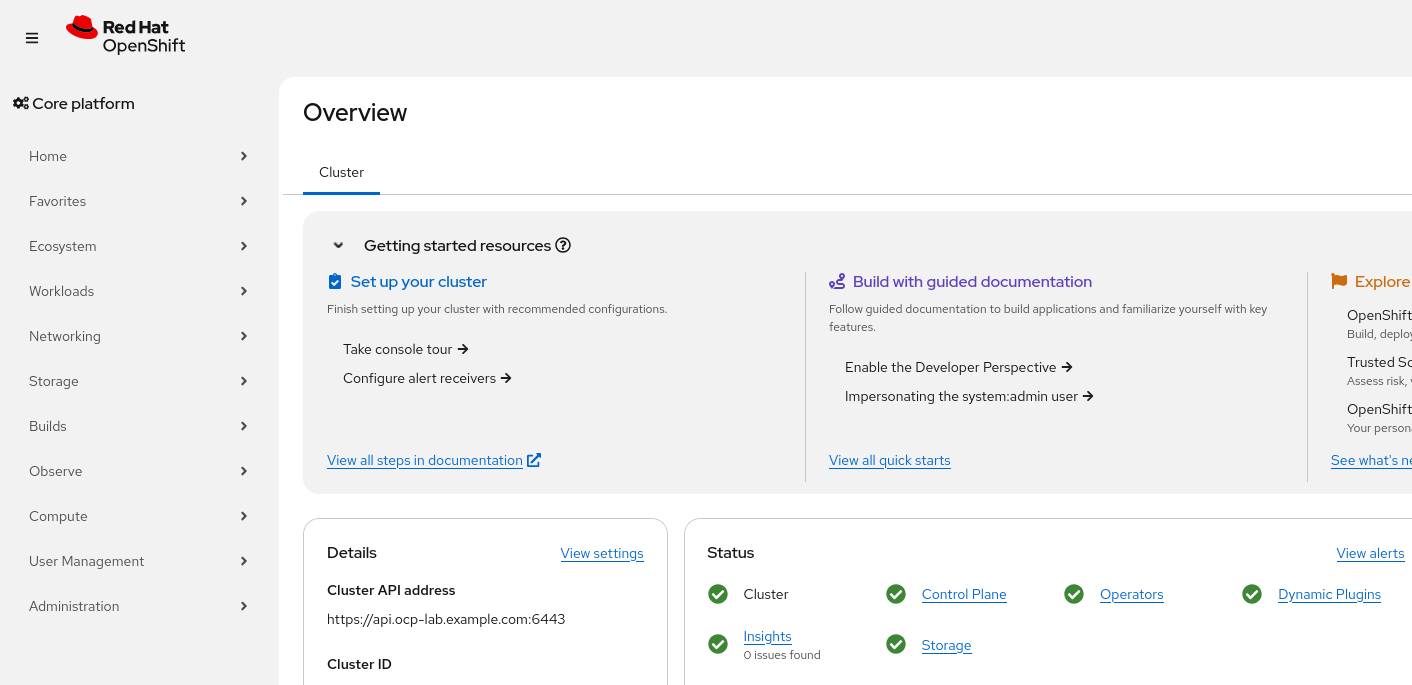
Add those /etc/hosts entries on your workstation, then open the OpenShift web console and log in with the admin user and the password you set in the vault (htpasswd_admin_password):
That’s it – a compact 3-node OpenShift cluster, with external Ceph/ODF storage and an HTPasswd login, running entirely on one Hetzner server.
Day-2: starting, stopping and tearing down
Because the whole lab is a set of libvirt VMs, lifecycle management is just a few targets:
make shutdown   # graceful shutdown (cluster -> ceph -> utility)
make startup    # bring everything back up in the right order
make cleanup    # destroy all VMs, OSD disks, golden images and the discovery ISO
make shutdown/make startup are handy for an auction server you only power through occasionally, and make cleanup gives you a clean slate to start over.
Wrapping up
Compared to the IPI approach in ocp4-in-the-jars, this Assisted-Installer flow removes a lot of the fiddly baremetal-emulation machinery: there’s no Redfish/IPMI emulation, no provisioning network, and the node-side installation is driven by Red Hat’s service. What’s left is mostly “create some VMs, point them at a discovery ISO, and let the automation finish the wiring” – which is exactly what I wanted for a lab that anyone can stand up.
The project is on GitHub: ocp-assisted-in-the-jars. It also supports distributing the VMs across multiple hypervisors and using a real bridge instead of NAT – but those are a story for another post. As always: labs only, not production.